A 3D-Printing Workflow: From Idea to Finished Product
This post is an example of the complete process of making a 3D-Printed object, starting with the initial idea and design, through to actually having the finished product. It's based on making a replacement knob for the oven in my apartment—a useful application for a 3D printer. Note that I have a Robo3D printer that uses 1.75 mm diamater PLA filament. Some details will differ for different printers or filaments.
Here are the steps, followed by some photos:
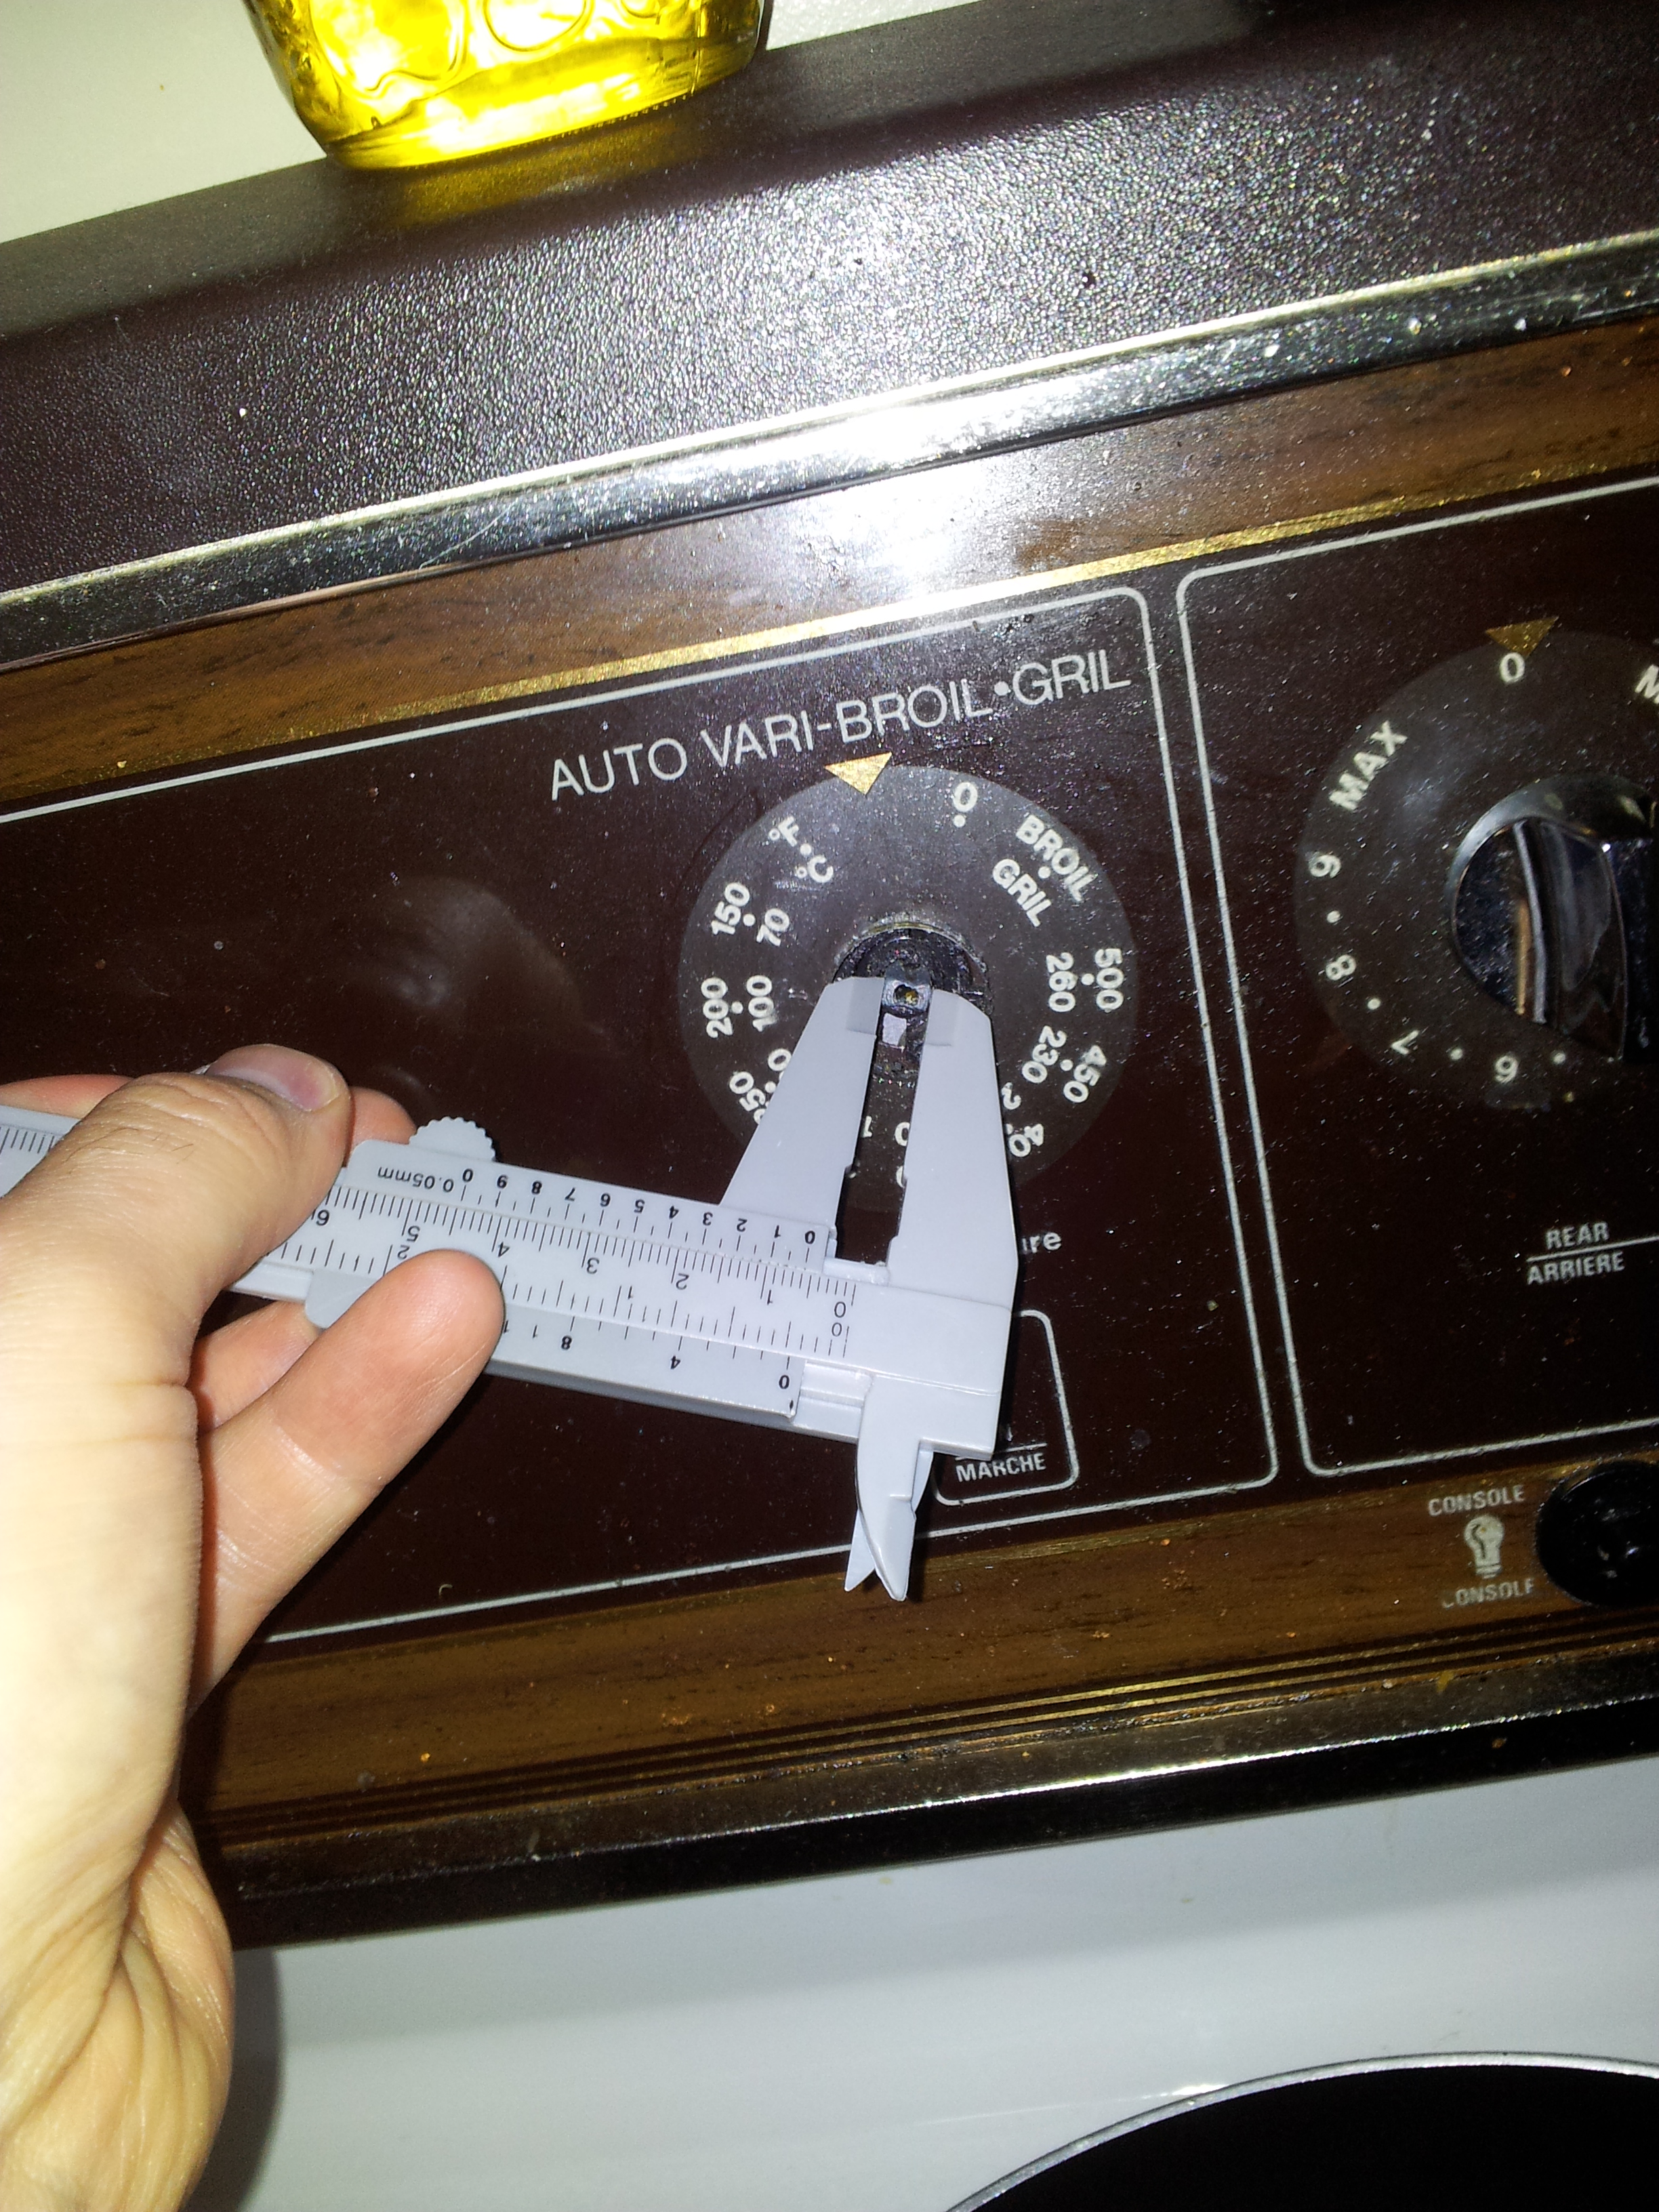
- Take measurements of any existing objects your piece will need to fit around or interface with. Remember to include a suitable tolerance in your design.
- Personally, I find it easiest to start the design with at least a rough sketch or some notes on paper. This helps to keep my thoughts clear when I sit down at my computer.
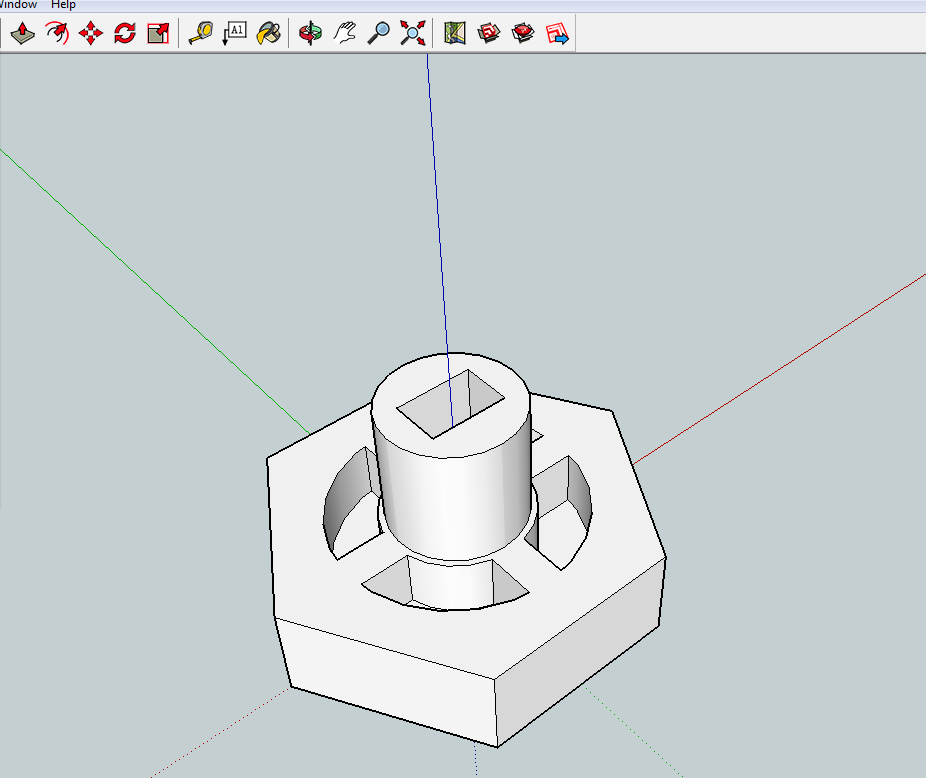
- Make a digital model of your design. I use SketchUp, but other software includes SCAD or using some tools people have shared (search on Thingiverse) to convert a 2D graphic to a 3D model. Most drafting or 3D modelling software should have some way—although it may require an intermediary—to export to the required file format (.stl), so if there's one that you're already familiar with, it's probably most convenient to use it.
- If it's not already, get your 3D model into .stl format. There is a free plugin to do so for SketchUp. If your model is very simple and you are feeling bold, it may be possible to write the .stl file by hand. I have a post on the topic.
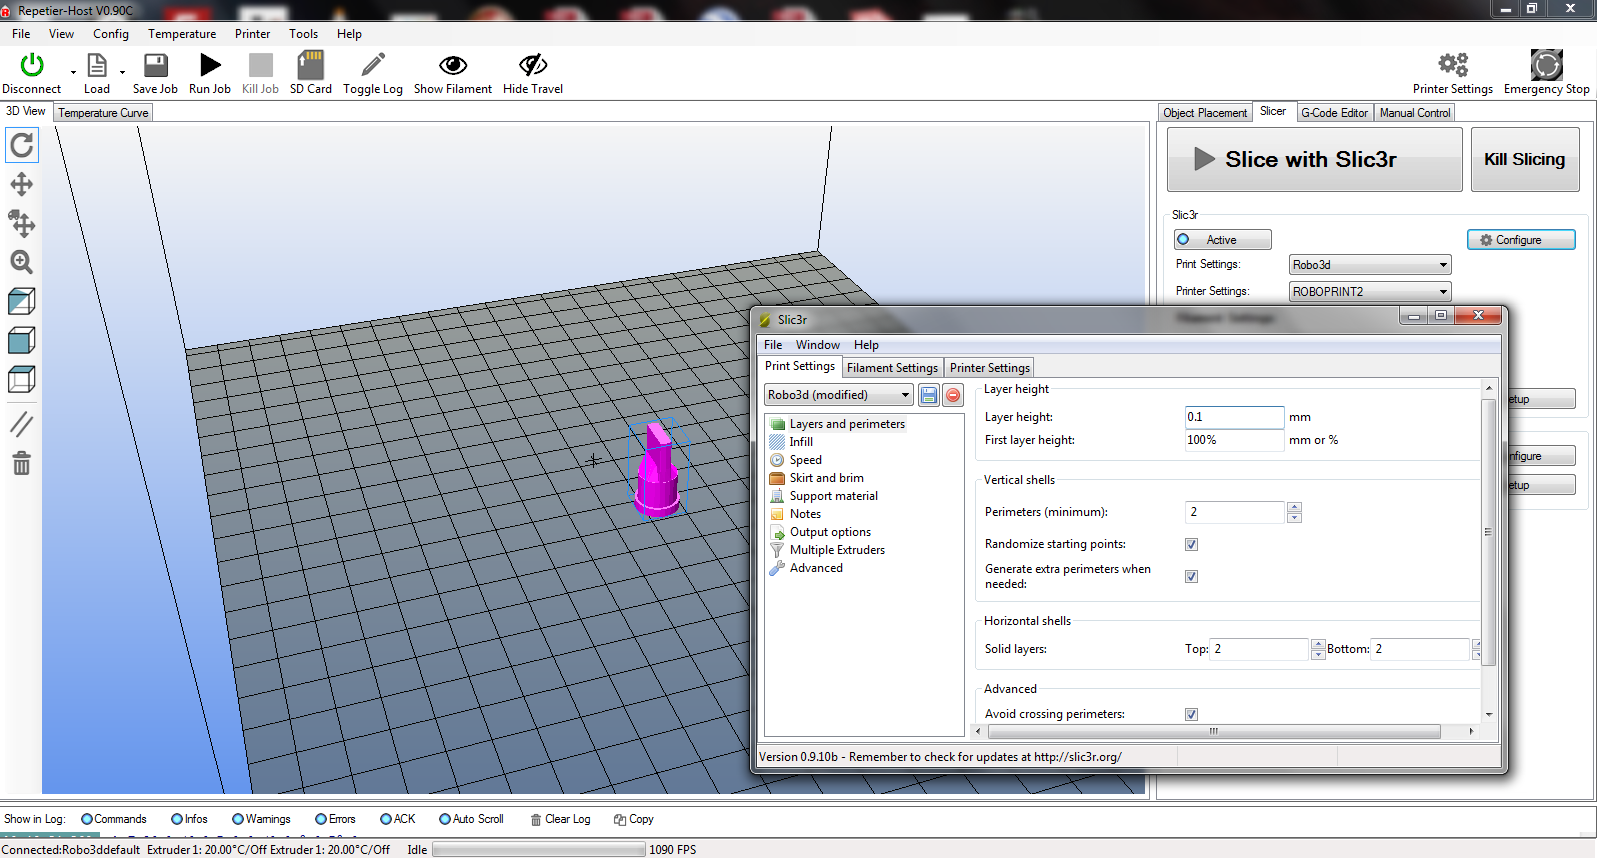
- Start the printer host software (e.g. I use Repetier-Host with my Robo3D). Connect the host software to your 3D printer. Import your .stl file into the printer host software. You can scale or rotate it on the print bed, or prepare a print bed with multiple models.
- Review the slicer settings. For example, depending on how fine a level of detail you're looking for, you can adjust the layer thickness. For strength, you can adjust the infill density. More detail and more strength equals a longer print time, though, so it's a trade-off. Some settings that work for me are: first layer thickness = 0.35 mm, other layer thickness = 0.2 mm, infill density = 0.3; however, the optimal settings will depend on the type of printer and filament you are using, as well as the design and application of the finished product. Really, you should experiment with different slicer settings and be prepared to discard some prints until you find out what works for your application(s).
- Run the slicer (e.g. Slic3r is included with Repetier-Host). Meanwhile, put painter's tape on the print bed and wipe it with rubbing (isopropyl) alcohol.
- Start the print run. You'll usually be able to tell quite soon if it will be successful; some signs of a problematic print job include the filament not adhering to the bed or a big lump of plastic getting deposited in one place. If adhesion is poor, quit the print job and try applying tape and isopropyl alcohol again, or change the slicer settings (experiment with different thicknesses and temperatures, especially for the initial layer; try adding more loops around the model at the start of printing), or verify that the bed is level and the z-stops are positioned properly. If there is an area that is deposited too thickly and obstructs the movement of the print head, pause the print job and try to flatten or remove it with tweezers. Be careful to avoid touching the hot print head with your hands.
- Once printing finishes, carefully lift the tape off the print bed and remove the model.
- Trim stray strands of filament with scissors or a knife (Exercise caution with sharp tools!). For a smoother-looking finish, try warming the plastic up with a heat gun. (Exercise caution with heat gun!)
- Test your printed part for its intended purpose. If it doesn't fit, modify the model (e.g. with looser tolerances) and try again. Alternatively, try a scale factor in Repetier-Host when placing the model.

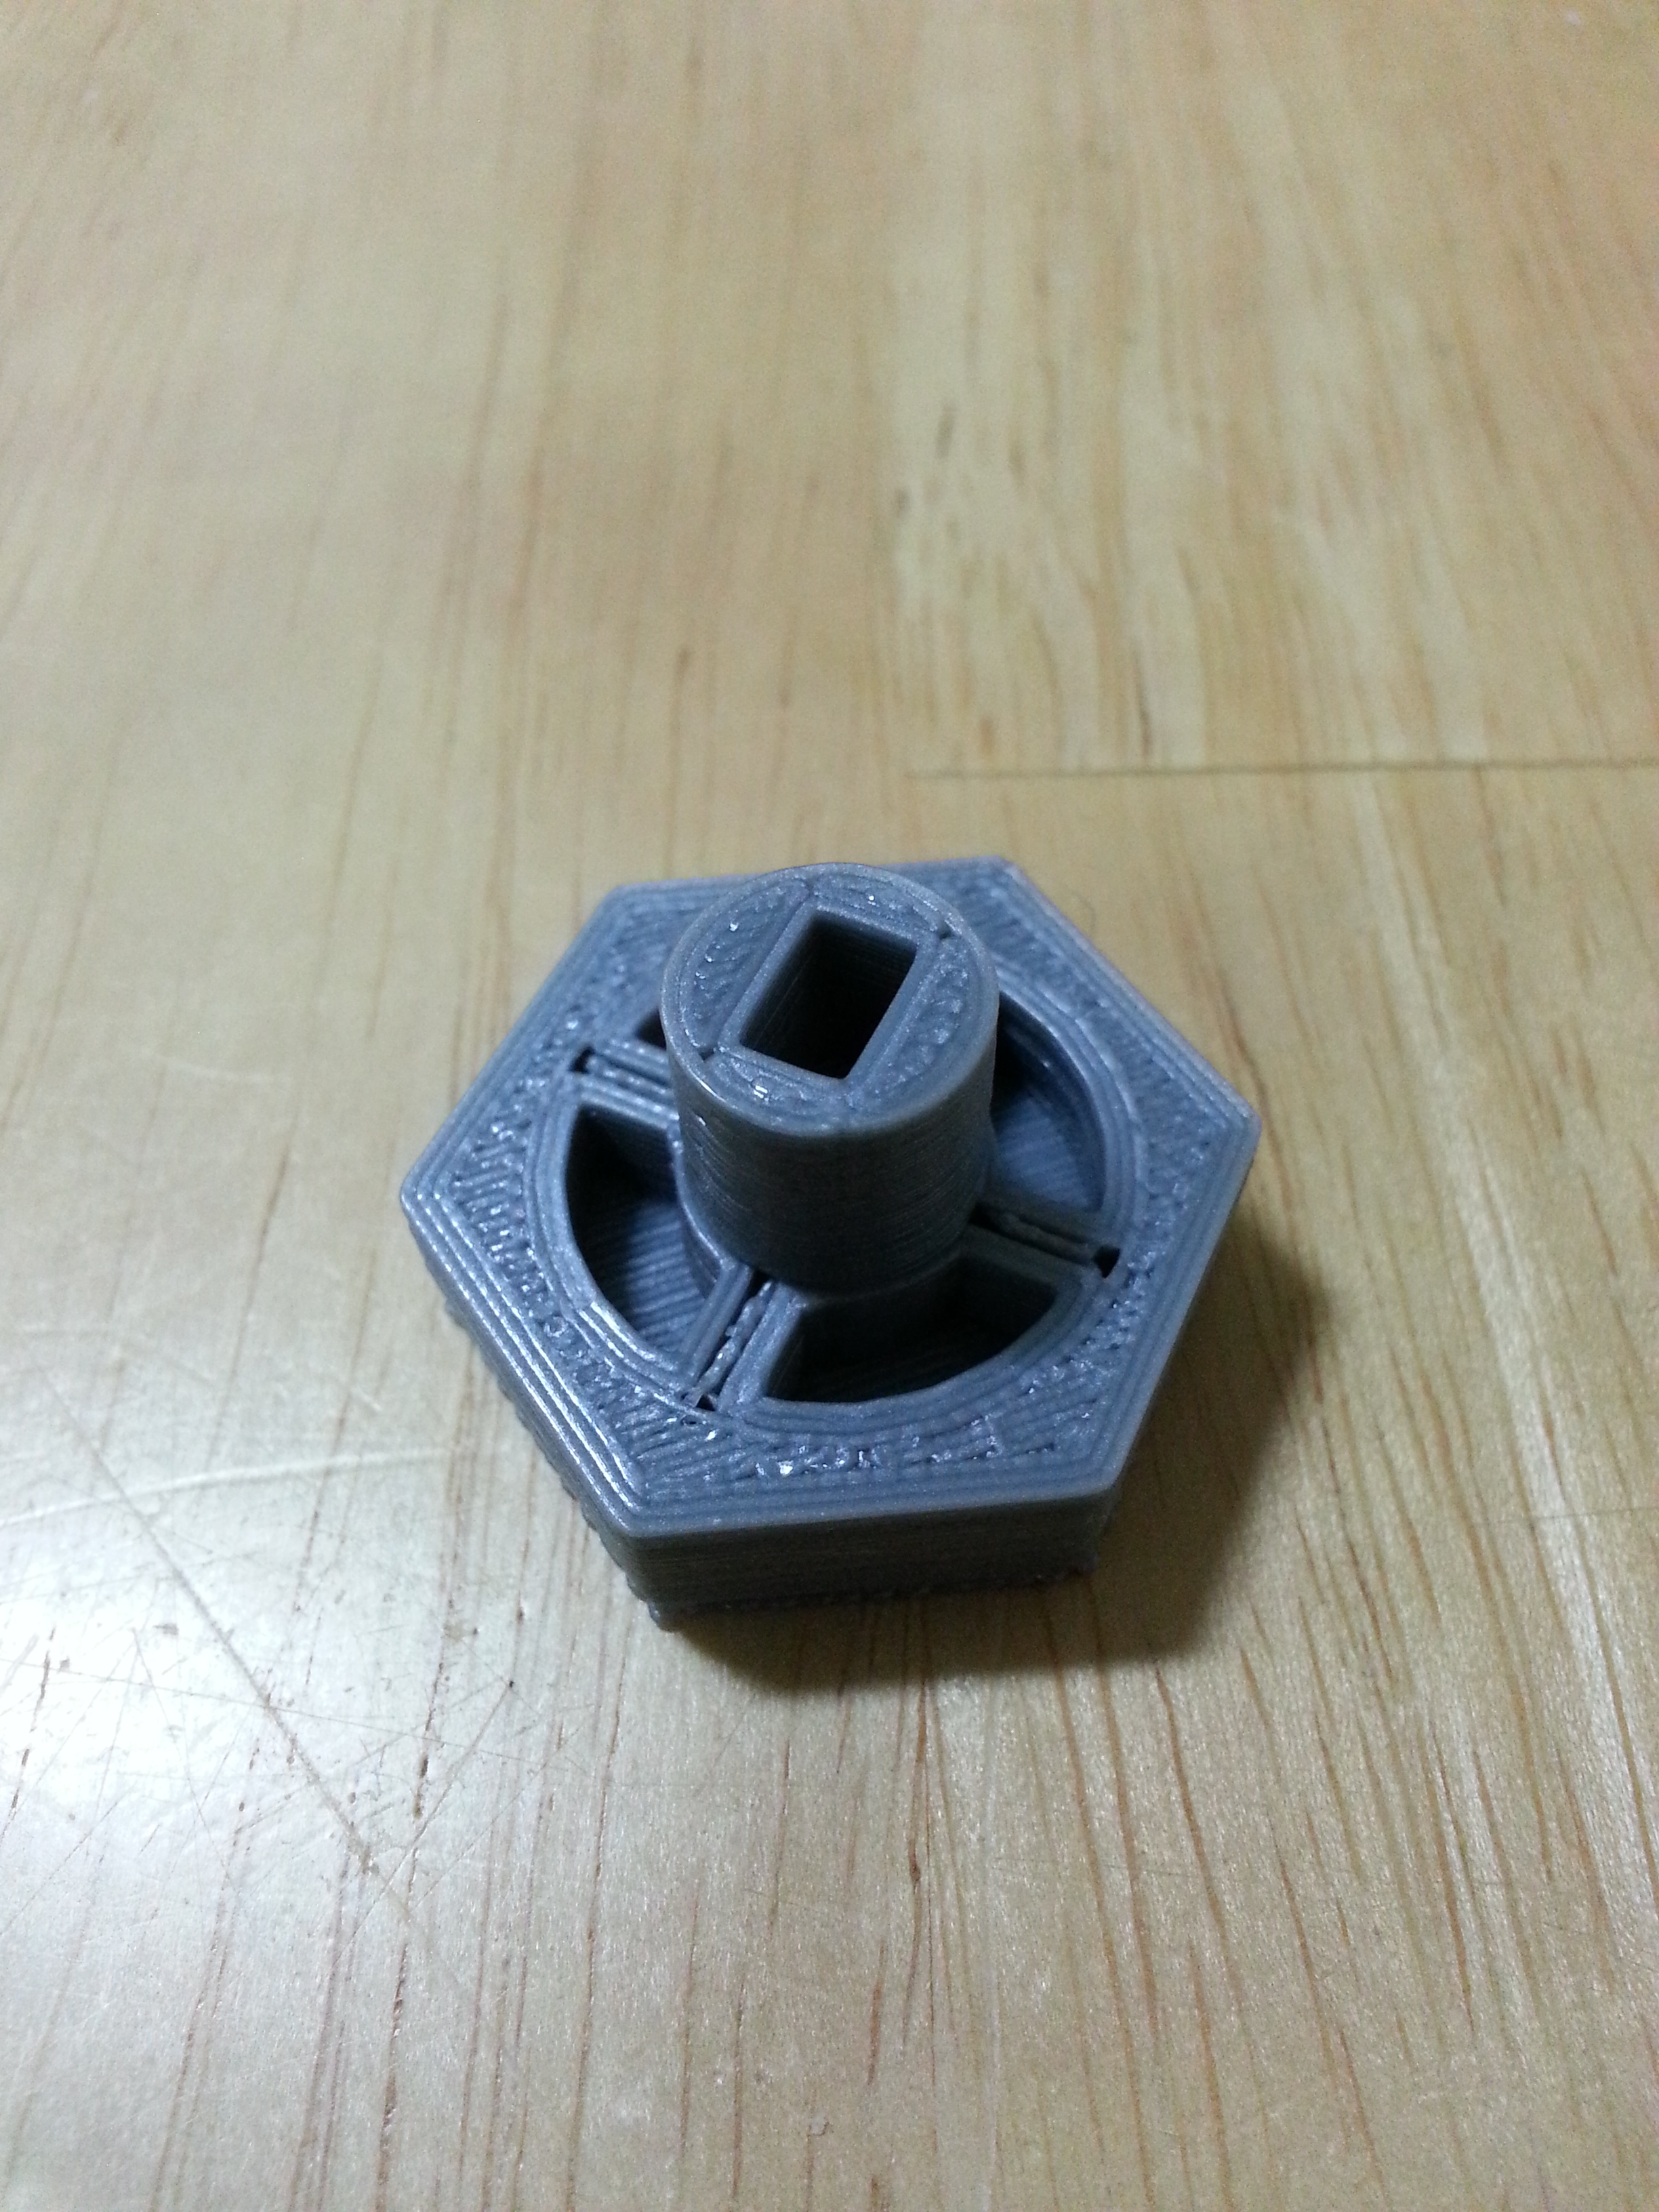
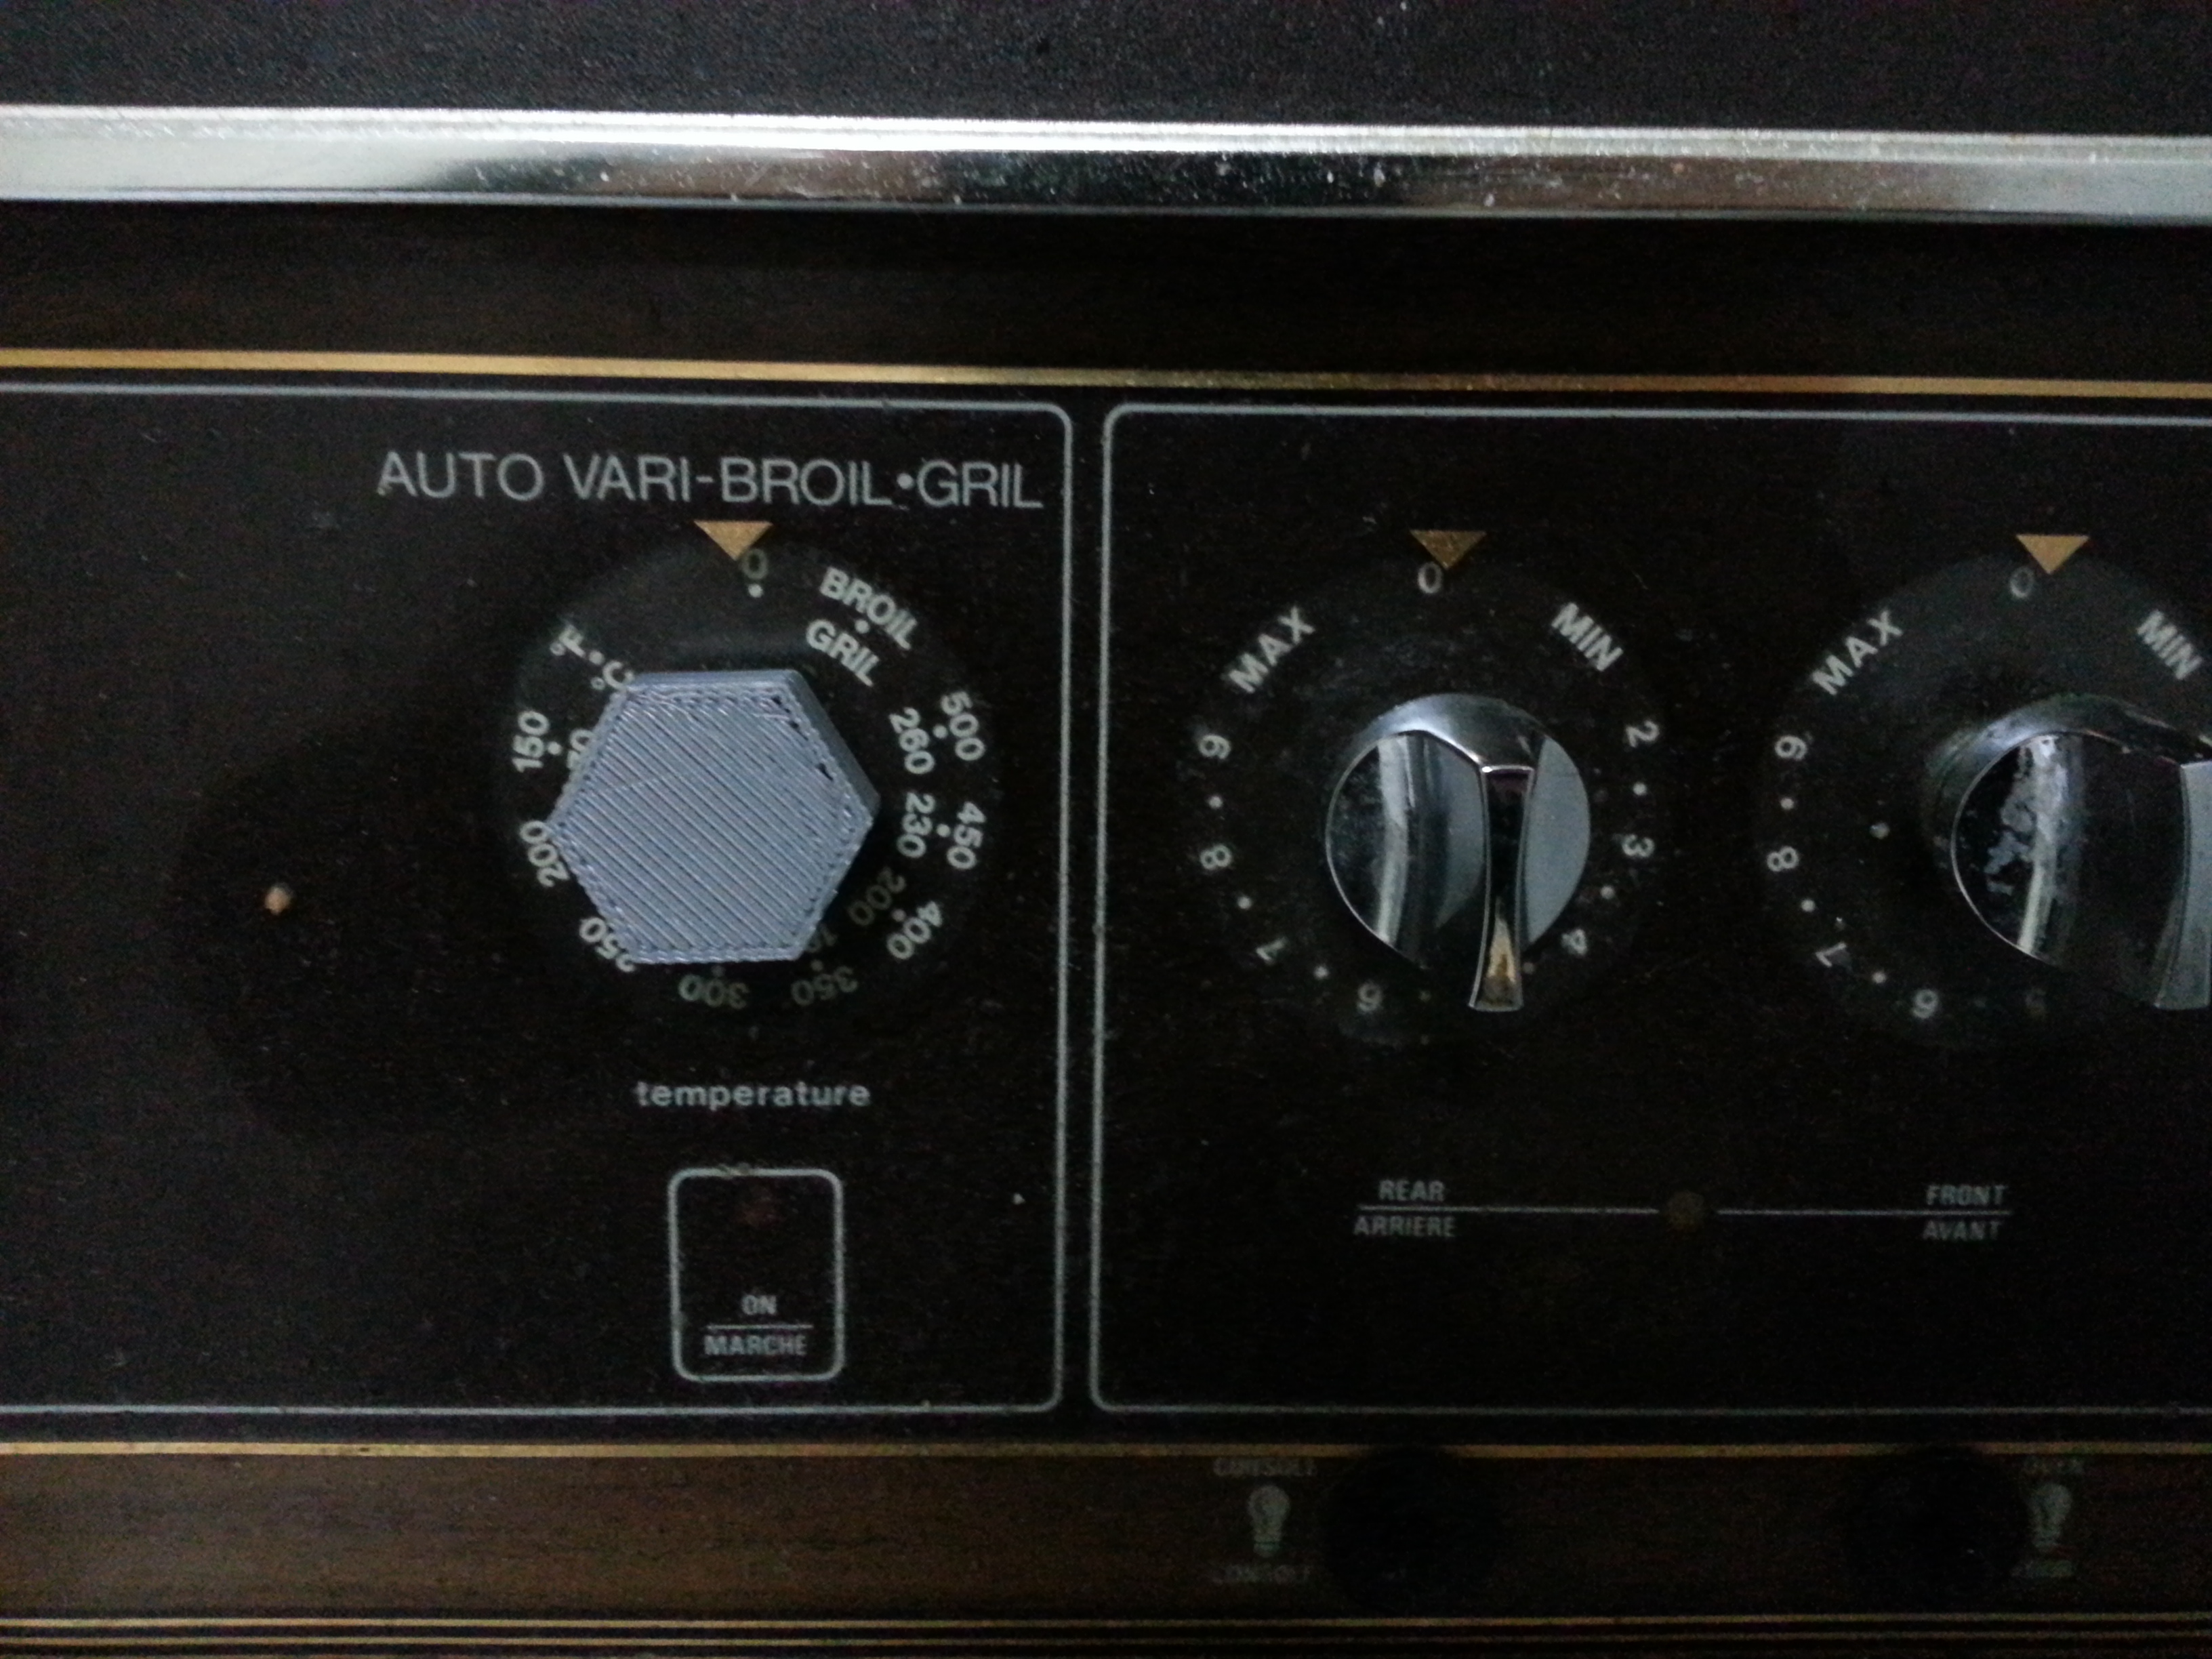
The oven knob model described in this post can be found on Thingiverse.