Fire and Water
Alternate title: A Tale of Two Tables (or perhaps Tables of the Elements)
This post is a write-up of a couple of DIY projects I did this year. The first one was a fibreglass water table for my 2-year-old daughter to play in with water toys outside. The second was a patio fire table (fueled by natural gas).
The water table was my first time applying fibreglass, and one of my goals for this project (aside from having a usable water table at the end of it) was to learn how to do so—in the long-term, I'd like to develop this skill to the point that I can try boat-building. I built the structure from 2x4s and a left-over piece of OSB. The table dimensions are 1.5' x 4'. There is a PVC pipe protruding through the wall at one end to provide a drain; it was also intended to provide a wet well for a circulation pump, but that part didn't work so well.
Here are a couple of photos of the water table, both while I was applying the fibreglass and the finished version:
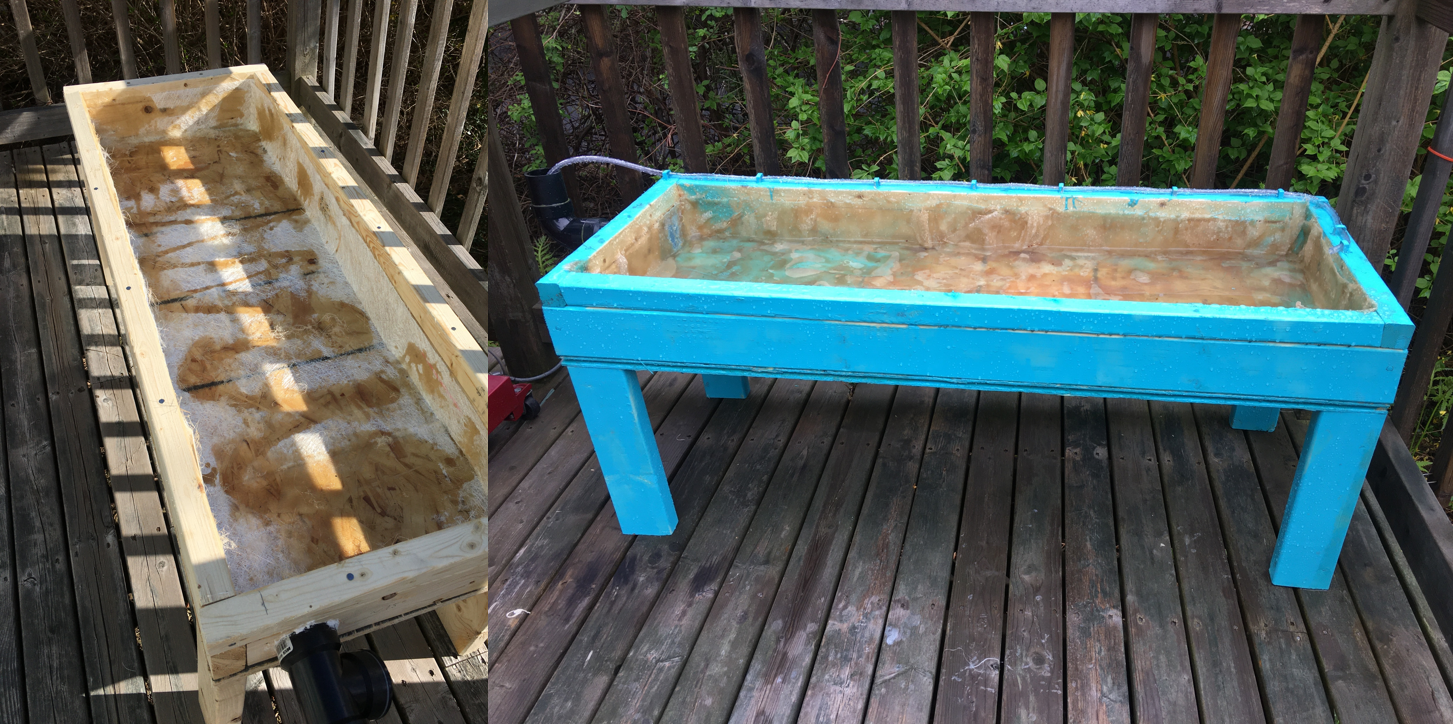
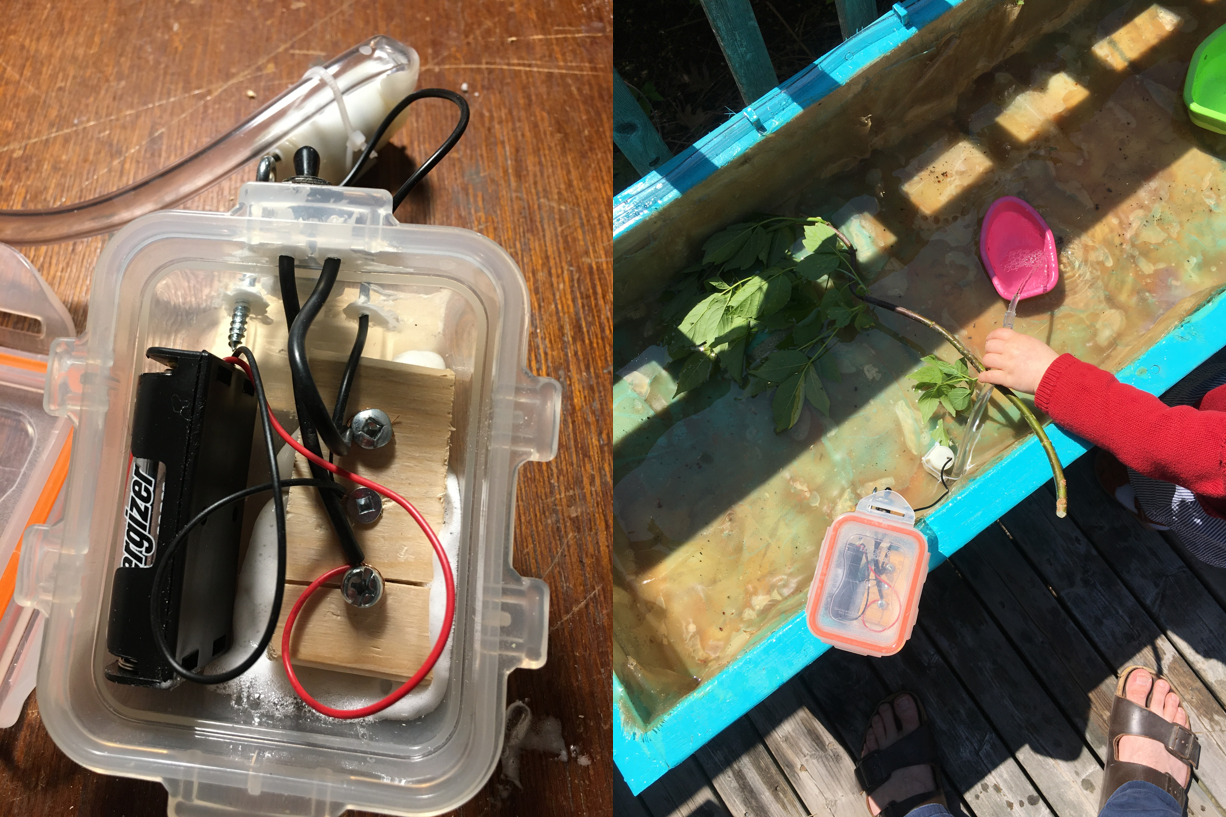
In the photo on the right, some bubbles and wrinkles in the fibreglass are readily apparent. Not only did this make the inside less smooth than I had hoped (although the sharp edges I was able to file down for safety no problem), it also wasn't water-tight. I ended up doing 4 or 5 coats of fibreglass, but there was still some dripping. What eventually worked was injecting some expanding insulating foam through holes I drilled at the site of each leak. Unfortunately, this also clogged up the PVC drain I had fabricated, since the joint between the pipe penetration and the fibreglass was one of the areas that wasn't well sealed initially.
It would have been nice if the drain had worked, because a table with standing water outside attracted insect larvae and needed to be drained and refilled frequently to get rid of them.
There was a little electric pump that I had made a battery pack for (see the photo below) that was intended to sit in the wet well. That part didn't end up being used according to my original design because of the flow to the PVC pipe being blocked, but the pump still ended up being a fun part of playing in the water table this summer—in fact, my daughter took to calling the whole thing her "pump table".
This was definitely a learning experience for me as far as applying fibreglass goes. I could have watched some tutorial videos first, but in the long run I think it's more educational to take a crack at something yourself, then compare to best practices as a form of trouble-shooting. In retrospect, I should have done some sealing (with caulking or body filler) before adding the first coat of fibreglass. Here are some other lessons I learned (from this experience and from watching some videos afterwards):
- have more resin than you think you need on hand
- plan on at least 5-7 layers for anything really important (e.g. a kayak)
- approx 100 mL of resin per sq ft of fibreglass cloth
- use big pieces on flat surfaces and small strips where bends or folds are needed
- use a final layer of just resin (and maybe an initial one too, so it can soak into the wood or other supporting layer)
- Use a bead of filler to make a bevel at any 90 deg bend since fibreglass has a minimum bend radius of 3 - 6 mm; also pre-seal any seams, holes, or gaps in underlying structure before using fibreglass.
For next summer, my plan is to try to rebuild a water table taking these lessons into account with my fibreglassing technique. I also have a couple of other design changes in mind: making it smaller so an adult can easily lift and dump it and a drain isn't required; have a solar-powered mini-pump instead of one with batteries (that battery pack got full of rust, in spite of attempts to seal it).
In spite of the challenges with making it water-tight, this made for an enjoyable play-zone so I'm glad I made it!
The patio fire table was also a satisfying project but I don't recommend trying to make one yourself unless you know what you're doing due to the risks involved. I've worked with gas equipment occasionally as part of my job so I went into this with some prior experience.
Here are a couple of photos of the fire table I built:
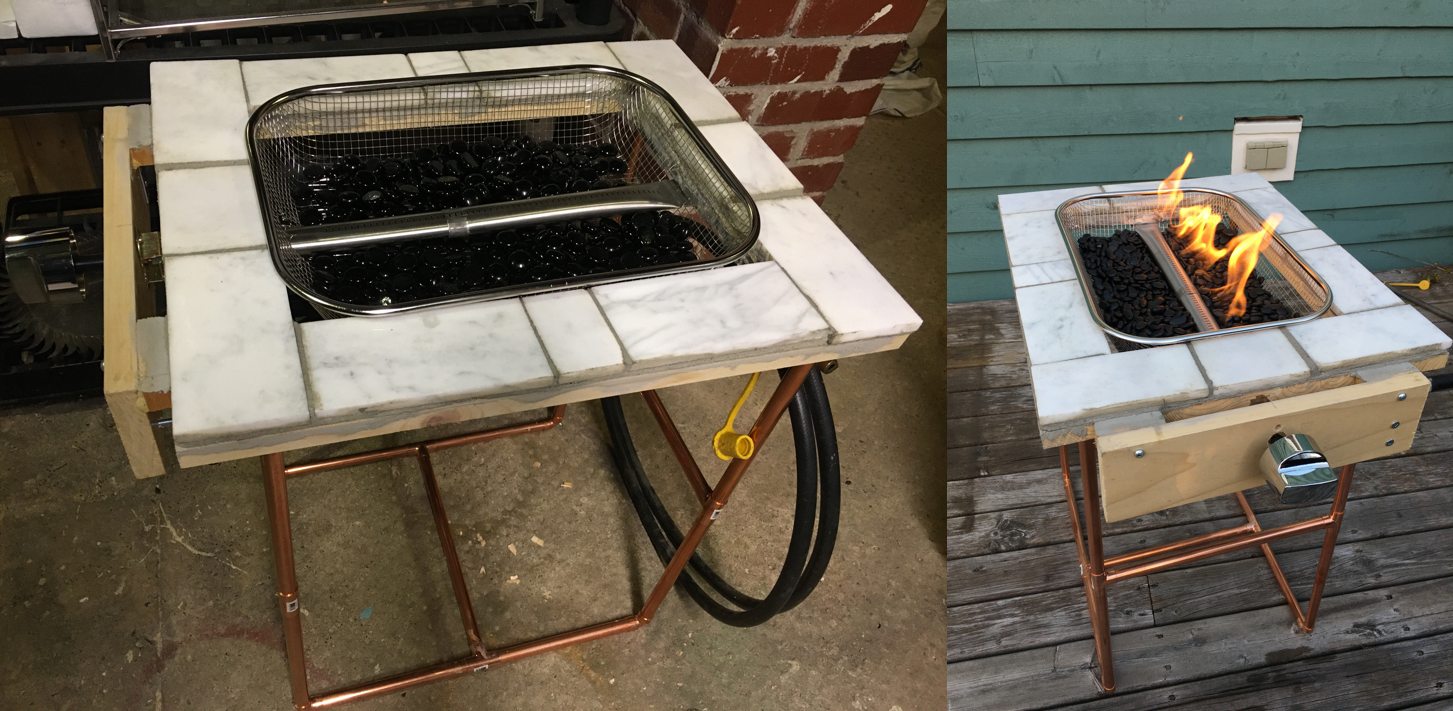
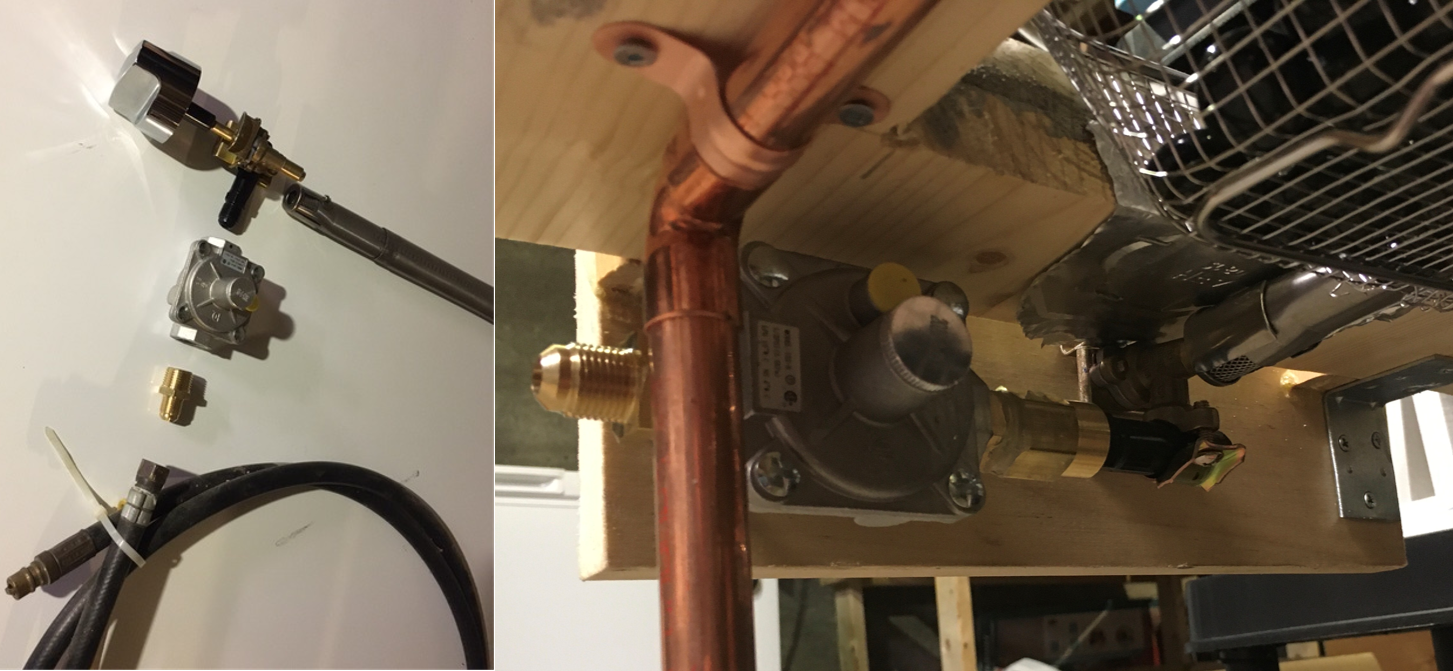
The legs are made of 1/2" copper pipe, and are 20" tall (plus the height added by two elbows and a tee). The table has a wooden base with a 10" x 14" hole cut into it; it is topped with marble tiles and has some heavy-gauge aluminum foil tacked around the inner edges to reflect heat away from the wood. There is a mesh basket holding some black stones sitting in the middle, and another board holding the D-stem control knob (and supporting the rest of the gas train on the reverse side) on the front. Fuel comes via a 3/8" natural gas hose (my house has an exterior natural gas connection on the back deck).
The components in the gas train are shown in the following photos. It consists of a pressure regulator (1/2" FPT thread, 4" W.C. NG pressure), a gas control valve (3/8" MIP thread, 1.75 mm orifice) and a couple of brass fittings to connect everything together. The orifice leaving the control valve is inserted into a barbecue burner tube.
As seen in the previous set of photos, it worked. The first moment of ignition was exciting! The flame in the photo is yellow (which is cozier, and also more visible for safety), but I was also able to get a blue flame. There is an air shutter on the burner tube that can pre-mix air via a venturi effect, and the air:fuel ratio affects the flame colour. Doing this project provided some motivation to read up a bit on flame dynamics, so I have some links to share that explain some of the theory behind gas burners.
- Here's a good discussion of flame colours. Yellow flames indicate incomplete combustion (from being gas rich/O2 poor); they look nice but they give off carbon monoxide so you never want them indoors.
- This is from a good reference site and discusses premixed versus diffusive flames as well as the effect of gas velocity.
- Here is more on the air:fuel ratio. Propane and methane have a similar air to fuel ratio by mass, so by volume propane needs more air (and therefore needs more of a pressure drop at the venturi for premixing).
- The orifice size is an important feature in gas burners. It affects the gas velocity and the BTU rating of the burner. Different gases (e.g. NG vs LPG) will use different orifice sizes.
- This is a reference table on orifice sizes. Natural gas regulated to a 4" W.C. pressure with a 1.75 mm (0.07") orifice size gives a BTU rating of 13,300 BTU/hr.
- A Rubens Tube is a cool way to demonstrate standing waves with gas burners.