Bangle Board
This post describes a couple of recent DIY projects I wanted to share.
My wife has a collection of bangles and was looking for an efficient way to store and display them. I made a board with pegs to hang them on. Here it is after the main construction (which was straightforward) was complete and after some finishing touches (where some creativity was involved):
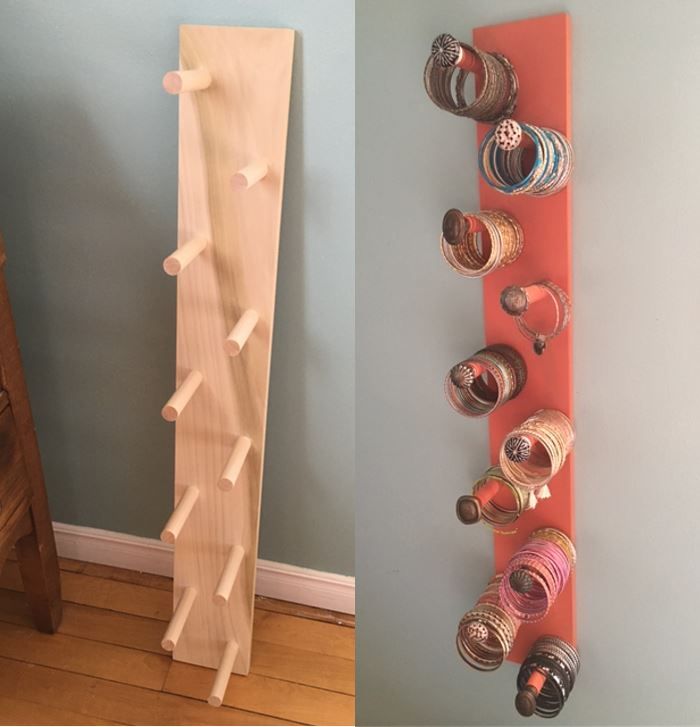
I used a 1x5 (4.625" actual width) poplar board cut to approximately 34" long. The pegs are 3/4" dowels 3" in length, inserted into holes drilled with a spade bit. The pegs are located 1" from the sides of the board, ~2" from the top and bottom; they are staggered between the sides and the vertical spacing is 7". By the Pythagorean theorem, that gives a spacing of 4-3/8" between the pegs, which is enough to take or replace bangles from one peg without disturbing another.
After being painted, the bangle board was then sanded enough so that a bit of the wood texture still shows. Eclectic drawer pulls were used to keep the bangles from sliding off the ends and to provide some visual interest.
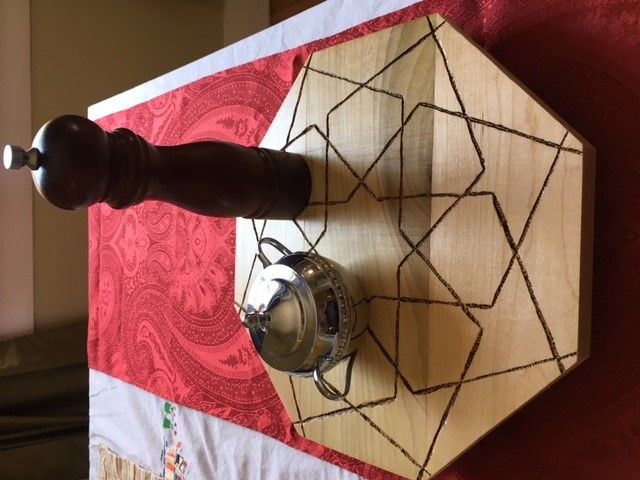
Another recent woodworking/DIY project I made was a lazy susan. It uses the same bracket that I used in my attempt at a homemade telescope. The top comprises three hardwood boards (a mix of maple and poplar) joined with glue and pegs, and with the ends cut at an angle to give an overall octagon shape.
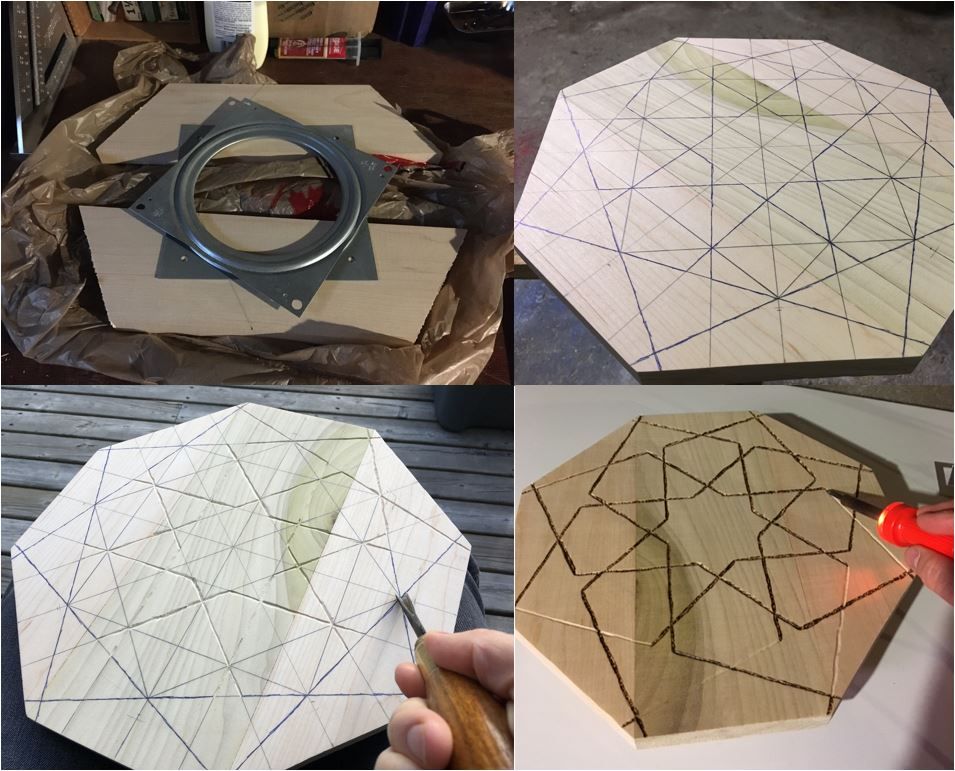
I decorated the top surface using a tiling motif whose pattern was in a book by Eric Broug. He provided instructions for drawing a bunch of construction lines (in pencil) then inking over the ones that are to be kept as part of the pattern. I then used a carving tool to gouge out the lines and a soldering iron to burn them into the wood for enhanced contrast. Here is the finished product: