DIY Telescope, Part 2
There's a project I was working on and have written about before that I put on the back burner for a while but got back into this weekend. Here are the results.
When I came up with the idea to try building a telescope, my goal was to use affordable components that could mostly be found in a typical hardware store. It is now assembled—and literally held together with duct tape and baling twine.
Here are some photos I took while I was building the telescope:
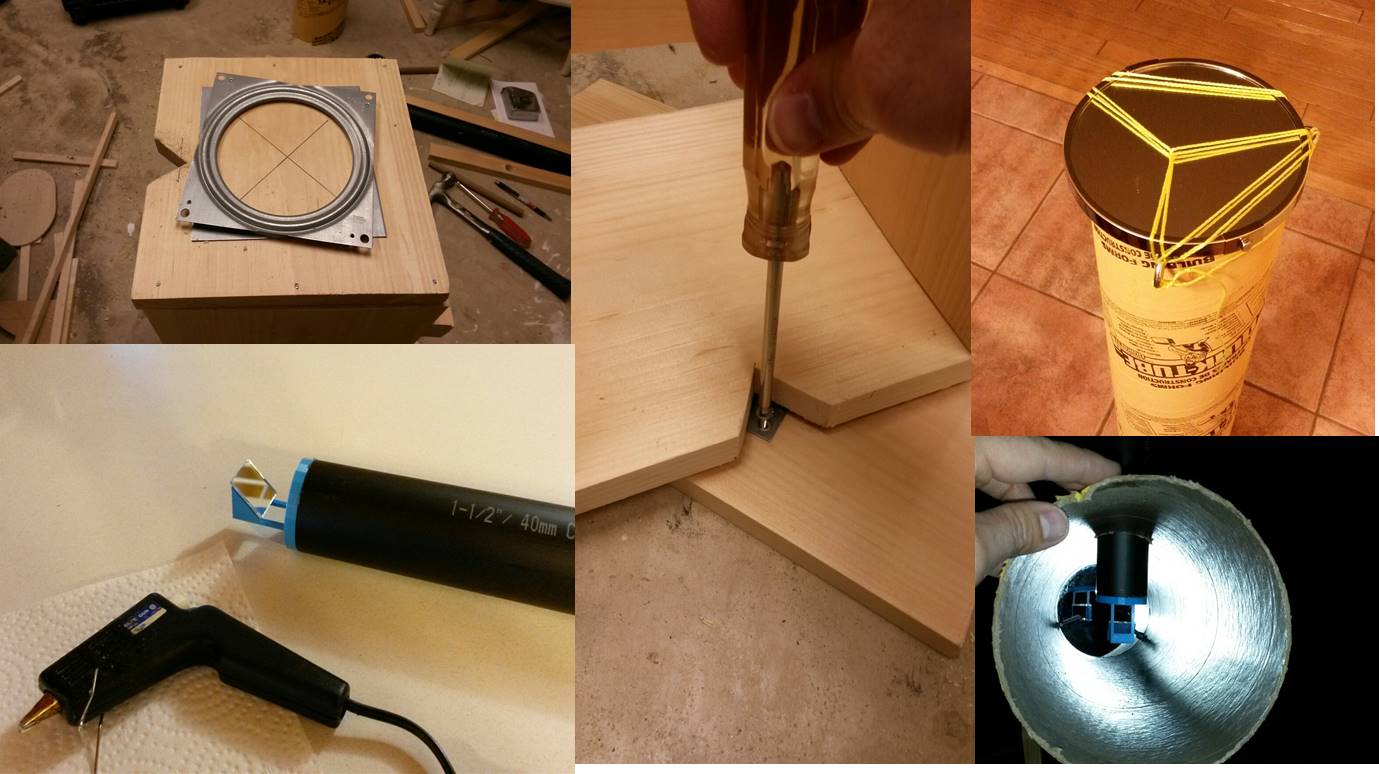
Going in order from top-to-bottom, left-to-right, the composite image above shows details of some of the telescope components:
- The lazy susan bearing on the bottom of the mount; the notch cut in the board was to allow access to screw the bearing to the base piece as shown in the centre image
- Using a glue gun to attach a small 1" square mirror to the 3D-printed bracket, and the bracket to the 1.5" diameter tube that is used as the eyepiece
- Screwing the bearing into the base piece of the mount
- The main (objective) mirror is secured to the bottom of the tube with eyebolts and string
- Looking into the telescope you can see the right angle mirror centered in the tube and a reflection from the objective mirror at the back
Aside from the 3D-printed angled bracket for the eyepiece mirror, everything can be found at typical hardware and craft stores. The bracket is something I designed on Sketch-Up; I've uploaded the design to Thingiverse.
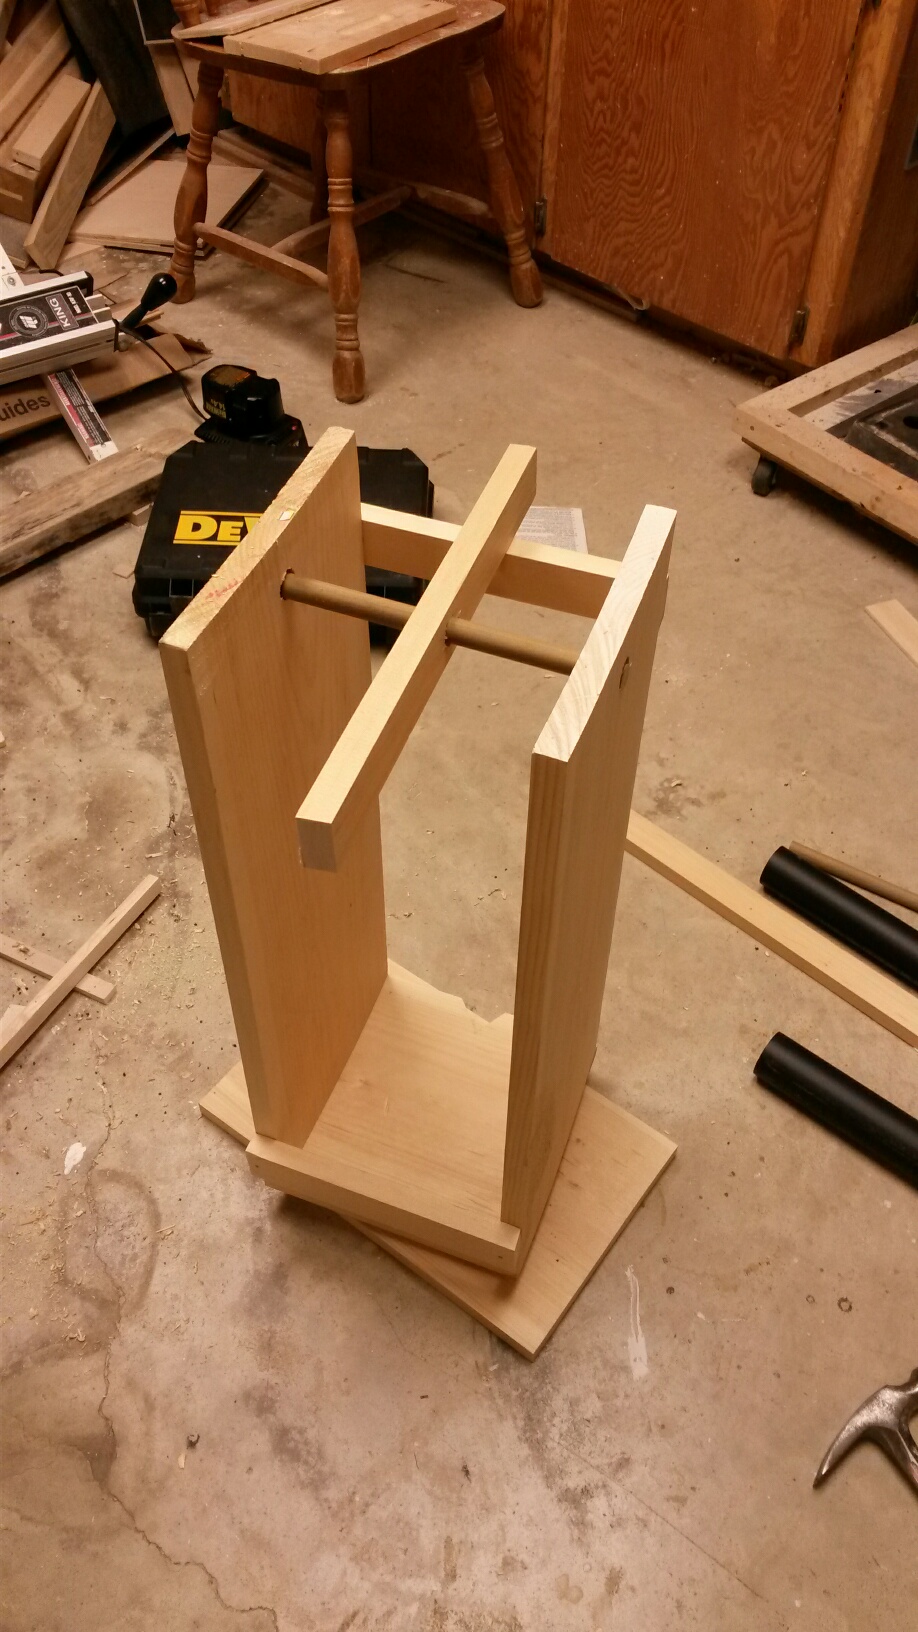
The following picture shows the mount for my telescope. It stands around two feet high and was made from a single 6-ft 1"x10" pine board (plus a couple of smaller boards for bracing). It has two axes: the lazy susan bearing at the bottom and the dowel at the top. This gives it two degrees of freedom, which is sufficient to aim around the sky.
Here is a picture of the assembled telescope:
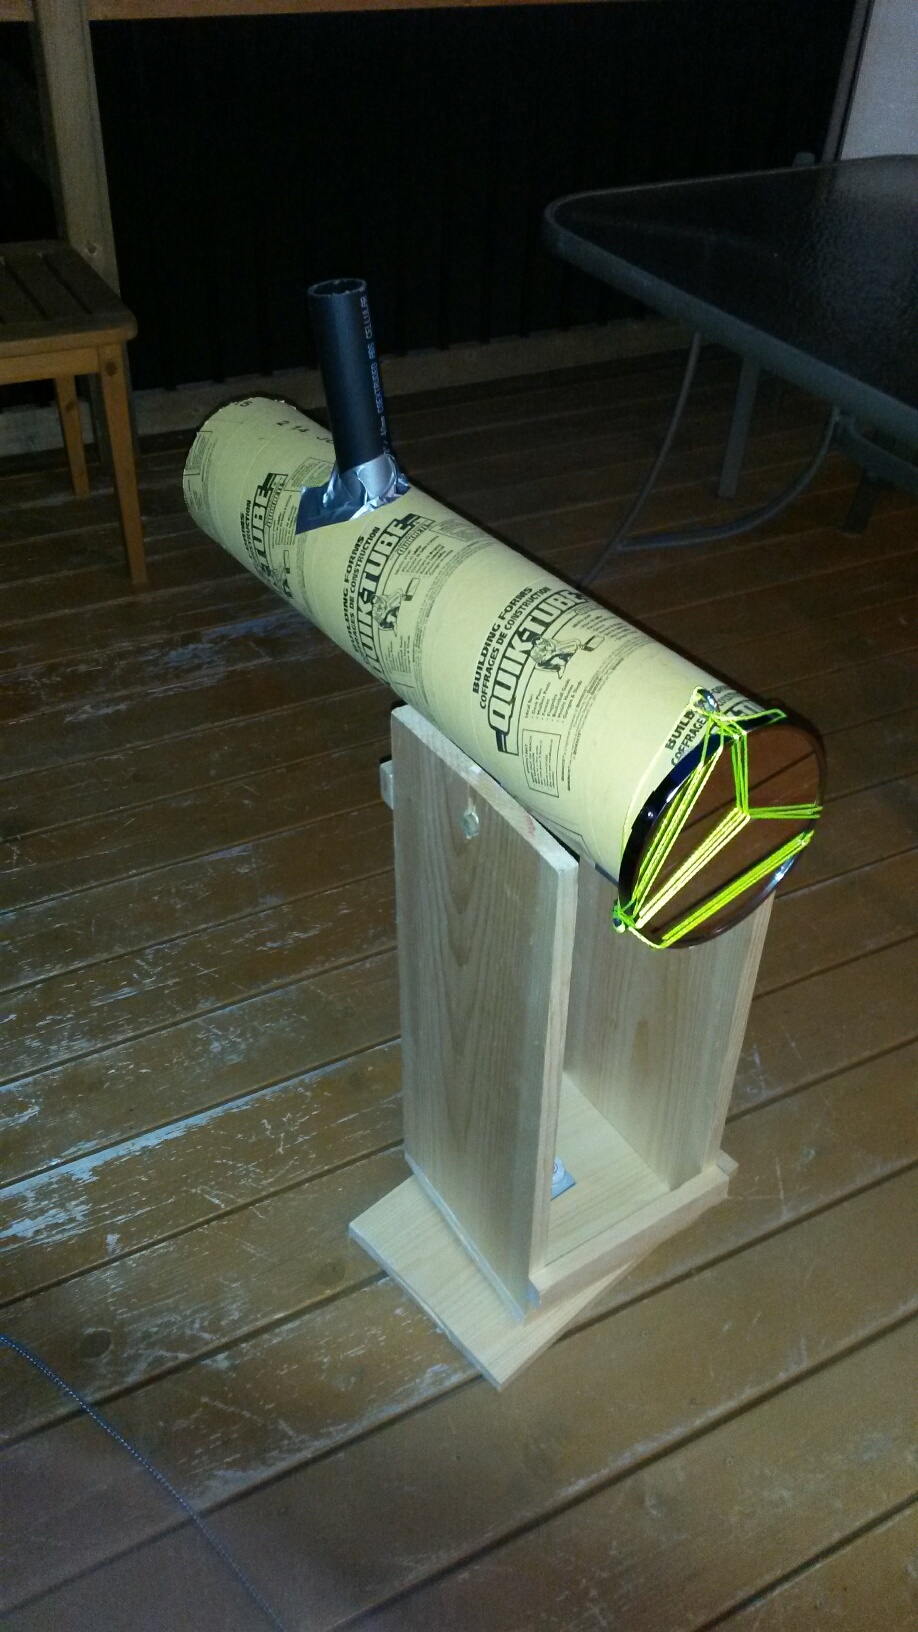
I cut the sonotube to be equal to the focal length calculated in my previous post about this project. The eyepiece is the same distance (25 cm) from the end as it is long, so the observer's eye is at a distance of f from the objective mirror.
When I tested the telescope, the moon was blurry (there weren't any stars to aim it at due to some wispy clouds and haze last night), so I can't call this project a full success yet. It might be that the magnifying mirror simply isn't of sufficient quality for this application. Another possibility is that the focal length is wrong. I calculated the focal length by measuring the geometry of the mirror and calculating a radius (the calculated focal length is almost the same if it is parabolic instead of spherical) but if the glass was a variable thickness then I wouldn't have been measuring the actual curvature of the reflective surface. Or there could have been other sources of error.
Another way to determine the focal length of a magnifying mirror is the point at which the image flips upside down. This distance was different from the focal length that I had calculated. So I plan to modify the telescope to try this different assumed focal length and see if it provides a clearer image. I also want to improve the way that the telescope tube is attached to the mount (right now it is duct taped to a single board with a hole that the dowel goes through).